Sunday 24 February 2013

Pasta with swordfish, aubergine and mint

Swordfish and eggplant pasta

We have pasta most days. I know that may horrify the carb-avoiders among you but frankly, nothing can match it for taste, speed and ease of preparation and I get withdrawal symptoms if I go for more than a few days without. The best pasta dishes are almost always the simplest - think of pesto, made with basil, pine nuts and parmesan or a fresh tomato sauce, sauteed quickly with maybe a finely chopped shallot or two and served with nothing more than a few basil leaves and a drizzle of olive oil. 

One of my favourite combinations for pasta is fish with fresh herbs and vegetables and this swordfish recipe is one of the finest. It originates in Sicily where the use of mint in savoury dishes is quite widespread and it's a custom that I love. This dish is arguably best made in late summer when aubergines and tomatoes are at their peak but I tend to think of it as something I can (and indeed do) make all year round. It's a beautifully balanced dish of flavour and colour. Just please make sure that you use fresh mint - don't even contemplate using the dried stuff here.

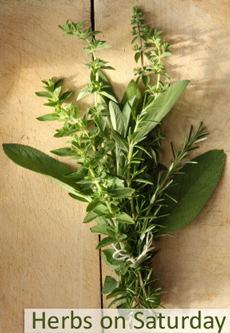
I'm sending this to one of my favourite challenges, Herbs on Saturday, created and hosted by Karen from the consistently wonderful Lavender and Lovage although I apologise for not having foraged for the mint!

Herbs on Saturday

I'm also sending this over to Javelin Warrior's weekly challenge, Made with Love Mondays which encourages us all to cook from scratch.

JWsMadeWLuvMondays

RECIPE

350g penne or other short pasta
1 large aubergine 
olive oil
300g swordfish
1 garlic clove
160g cherry tomatoes, rouhgly chopped
a bunch of mint, chopped

salt and freshly ground pepper

Start by dicing the aubergines into 1cm cubes. Some people salt them before cooking to draw out excess moisture and bitterness but I don't bother - I've tried doing it and really I don't think that it makes a difference.

Pour some olive oil into a large frying pan, about 1-2 cm,  and when it's hot, fry the aubergine cubes until golden brown. Remove using a slotted spoon and place on a paper towel to absorb the excess oil. You may need to do this in two batches. Season with salt and add half of the chopped mint.

Discard the oil and give the pan a quick wipe. Remove any skin from the swordfish with a sharp knife and cut into cubes, roughly the same size as the aubergine. Lightly squash the garlic clove, making sure it stays intact and heat with a tablespoon of olive oil in the frying pan. When it just starts to colour, discard the garlic and add the swordfish. Fry quickly for 2 minutes, then add the cherry tomatoes and cook together for a further 2-3 minutes. Season with salt and pepper.

In the meantime, cook the pasta in salted water according to instructions.

When the pasta is al dente, drain quickly and mix all together with the swordfish, tomatoes, aubergine cubes and the rest of the mint.

Swordfish aubergine pasta


Tuesday 19 February 2013

Banana and Walnut Cake


I never ate banana cake as a child - it wasn't part of my family's baking repertoire. Rather unusually, I had my first unforgettable taste of it at university. Unusual because baking didn't really feature much in my time at university although my friends and I did eat well - we cooked 'real' food and enjoyed long, civilised dinners most nights. However, apart from the home made goodies my mum occasionally sent to me, freshly baked cakes were rare, with the exception of my friend's banana bread. She mostly made this when she was in a particularly fragile state after a heavy night out. I never got the recipe from her but it involved using a yoghurt pot as a measuring tool, the yoghurt being one of the ingredients. Effort was minimal, no machinery required (we didn't have any anyway) but the result was fantastic - moist, tangy and extremely comforting. The kitchen was filled with a delicious aroma and a thick slice of banana bread, warm from the oven with a strong black coffee was the perfect accompaniment to a laughter-filled review of the previous evening's antics.

When I bought Nigella's How to be a Domestic Goddess book, banana cake was the first thing I made. Reassuringly, the kitchen was filled with the same delicious nostalgic smell, and the end result, while different from the one I remembered from my university years, was wonderful. I have made it many times since but have tweaked Nigella's original recipe (which can be found here). I omit the sultanas and alcohol, up the quantity of walnuts and bananas and bake it in a shallow, rectangular tray so it is more a banana cake than a banana bread. Although I first did this because I couldn't find my loaf tin, I discovered that I actually preferred it. It takes less time to bake and seems to cook more evenly. It is wonderful - moist, nutty and full of flavour. Even people who aren't keen on bananas enjoy it and it keeps really well, staying moist for a good few days. Like the original university banana bread it is incredibly easy to make, requiring no more than a spoon and a mixing bowl. A cream cheese icing goes well with the flavour of the bananas but to be honest, the cake is so sweet it doesn't actually need anything else - I even regretted dusting the top with icing sugar for the photo. It is perfect in its simplicity.

Feb one ingredient

As you can see from the logo, the February One Ingredient challenge is Bananas so my post is on its way over to this month's host Nazima at the gorgeous new-look Franglais Kitchen, co-hosted by the ever-prolific Laura from How to Cook Good Food.

ForeverNigella_Banner_23

February's Forever Nigella theme is Nostalgia so I'm also sending this over to this month's host, Urvashi at Botanical Baker and linking it to Sarah from Maison Cupcake who organises this fabulous challenge.


RECIPE

175g plain flour
2 teaspoons baking powder
½ teaspoon bicarbonate of soda
½ teaspoon salt
125g butter (melted)
150g white sugar
2 large eggs
5 small, v ripe bananas, mashed with a fork
75g walnuts (chopped)
1 teaspoon vanilla extract

A baking tin, 17 x 26cm approx, greased and lined with greaseproof paper

Preheat the oven to 170ºC.

 Put the flour, baking powder, bicarb and salt in a medium-sized bowl and mix well.

In a large bowl, mix the melted butter and sugar and beat until blended. Beat in the eggs one at a time, then the mashed bananas. Then, with your wooden spoon, stir in the walnuts and vanilla extract. Add the flour mixture, a third at a time, stirring well after each addition.

Pour into the prepared tin and bake for about 30 mins. When it's ready, an inserted toothpick or fine skewer should come out cleanish. 

Leave in the tin to cool for about 15 mins before turning out onto a wire rack.  

Eat still warm, while reminiscing with friends. 


Saturday 16 February 2013

Pasta with peppers


I'm almost embarrassed to call this a recipe as there are basically only two ingredients, pasta and peppers, and the method is laughably simple, requiring no more than a bit of chopping and some stirring. From this, you may think that it's not really worth it - I mean how tasty can it be if there's so little involvement in the making of it? However, that would be a great mistake because this dish is utterly delicious. Cooked slowly, the peppers begin to caramelise in the olive oil, becoming soft and sweet, completely transformed from their raw, indigestible state. The juice they give off combines with the oil to turn into a sauce which then coats the pasta. All in all, I think it's close to pasta perfection. If you like peppers, I urge you to try this.

As this month's theme is peppers, I'm very pleased to be able to join in with the Pasta Please challenge, started by Jac over at the amazing Tinned Tomatoes and hosted this month by Lisa from We don't eat anything with a face. I'm really looking forward to seeing what other people have come up with this month.


RECIPE - serves 3-4
  • 350g long pasta - bucatini (thick spaghetti-like pasta with a hole running through it) is ideal here but failing that you can use linguine (as I have for the photo) or even spaghetti
  • 6 peppers (if you can get different colours, it makes for a more visually pleasing dish; red, yellow and orange are better for flavour but you can use a small green one too if you must but remember that they don't match up to the others for taste)
  • extra virgin olive oil
  • salt and pepper to taste
  • lots of fresh parmesan to serve
Wash the peppers and deseed. Roughly slice them up. In a large frying pan (with a lid), pour in enough olive oil to just coat the bottom. Put over a medium heat and add the peppers, turning them in the oil. Cover and cook for about 15 minutes, stirring frequently.

After 15 minutes, remove the lid and continue cooking uncovered for a further 10-15 minutes, stirring occasionally. The peppers are ready when they are soft and just beginning to brown at the edges. At this stage, season to taste.

Cook the pasta according to instructions, making sure you've salted the water well - it really does make all the difference. Near the end of the cooking, take a ladleful of the pasta cooking water and add to the peppers. When the pasta is al dente, drain well and mix with the peppers. Drizzle over a little more olive oil if you think it needs it and serve with lots of freshly grated parmesan.


Monday 11 February 2013

Frittelle di Ricotta - Sweet ricotta fritters


Although I suspect very few people actually do any fasting in the forty days of Lent any more, most of us still follow the tradition on Shrove Tuesday (Martedi Grasso) of using up our 'rich' foods such as eggs, sugar and milk and pancakes are certainly not the only way to do this. In many European countries, various types of doughnuts are a more common way of celebrating: in Madeira they are known as malasada, in Lithuania, spurgos and in Poland they come in the form of jam-filled pączki where a small amount of alcohol is added to the egg-rich dough, preventing the absorption of too much oil when they are fried.

In Italy, in the weeks leading up to Lent, the eggs/sugar/milk combination takes different forms, from chiacchiere (thin ribbons of deep fried pastry) to castagnole (soft, vanilla-scented mini doughnuts), not forgetting the many different types of fritter. Although I'm not wild about fritters in general, these ricotta-based ones are wonderful - light, luscious, bite-sized clouds.


As these pillowy, fragrant frittelle make a perfect end to a meal, I'm sending them over to Kate at the marvellous What Kate Baked as my Tea Time Treats entry. This is the monthly challenge she hosts along with Karen from Lavender and Lovage and this month's theme is Puddings. 


RECIPE

200g ricotta
100g plain flour
2 large eggs
80g caster sugar
zest of one lemon
pinch of salt
1 teaspoon baking powder

vegetable oil for frying
icing sugar

Put the ricotta in a bowl and beat until smooth and creamy. Add all the other ingredients, finishing with the flour. Mix until you have a smooth batter. Leave it for an hour or two.

When you're ready to make the fritters, fill a wide, shallow pan with about 2 cm of oil and heat until a drop of batter sizzles when dropped in.

Fry rounded teaspoons of batter, making sure you don't overcrowd the pan, about 5 at a time is ideal. Quickly flip them over when they are golden brown and leave them to cook for a minute on the other side.

Take them out carefully with a slotted spoon and place on some kitchen towel to absorb some of the grease. Serve straightaway, with icing sugar sprinkled liberally over.


Tuesday 5 February 2013

Carrot Cake Perfection

 
I think it's safe to say that a homemade cake beats a shop-bought one hands down. Really, there's no contest - flavour, texture, absence of 'nasty' ingredients, the homemade one is superior every time. Even when my own cakes turn out less than perfect, they're still far better than the bought ones. There is one notable exception however - that is, carrot cake. Now I absolutely love carrot cake, in fact I would go as far as to say that it is my all-time favourite cake (along with apple cake, banana cake and maybe one or two others) and in my quest to find the perfect recipe, I have baked many over the years. They have always been 'nice' but they have never even come close to matching the carrot cake perfection emanating from the kitchens of Pret a Manger. Theirs is a rich, creamy, moist creation, heady with cinnamon and with an unbeatable texture - the apogee of carrot cakes. It seemed as though I would never be able to reach those baking heights. Unwilling to give up, I made a note of the ingredients (pineapple was the unusual one) and trawled the internet, eventually finding that elusive recipe. Since then, it seems to have appeared everywhere and I have discovered that there is even a Pret a Manger cookbook which includes the recipe. No matter - the important thing is that I now have the wherewithal to bake that moist, toothsome concoction myself.
 
The cake is so deliciously moist that it doesn't even really need the icing although it does go so well that it seems a shame not to add that final creamy layer. If I'm serving it as a breakfast cake (Italians do love a cake for breakfast and this fulfils that function extremely well) then I tend to leave it un-iced; in other cases I add the icing. The cake keeps really well too. As I said, perfection.
 
I'm sending this along to Javelin Warrior's wonderful weekly challenge, Made with Love Mondays, encouraging all of us to cook from scratch.
 
JWsMadeWLuvMondays

RECIPE

2 eggs
200g soft brown sugar
150ml sunflower oil
200g grated carrot
50g walnut pieces, roughly chopped
75g diced pineapple (fresh or tinned), roughly chopped
50g desiccated coconut
200g plain flour
1tsp ground cinnamon
1tsp bicarb of soda
1tsp salt

200g icing sugar
50g cream cheese, room temperature
25g unsalted butter, room temperature
a dash of vanilla essence

I use a rectangular baking tin, 17 x 26cm approx, greased and lined with greaseproof paper but if you prefer a round cake, use a 21cm baking tin
Preheat the oven to 150°C

In a large bowl, whisk the eggs with an electric beater until doubled in volume then add the sugar and continue beating until pale and fluffy. Keep whisking on a high speed and pour in the oil in a steady stream. Keep beating until the mixture holds the shape of a trail across the surface.

Gently fold in the grated carrot, chopped walnuts, chopped pineapple and coconut. Sift the flour with the cinnamon, bicarb and salt and fold them gently into the batter.

Scrape the mix into the prepared tin and bake for about 1 hour or until a skewer comes out clean. If the top of the cake seems to be browning too quickly, cover it lightly with some foil to protect it from burning.

When the cake is baked, leave it to cool in the tin for 10-15 minutes before turning it out on a wire rack to cool it completely.

For the icing, beat the butter and cream cheese together with an electric whisk until smooth. Beat in the vanilla essence then add the icing sugar in three batches, whisking in each batch before adding the next. Put aside in the fridge to set a little otherwise it will be too runny to ice the cake.

You can ice the cake when it is cold. I usually just ice the top of my rectangular cake (pret style) but you can of course slice the cake in half (especially if you've baked it in a round tin), double the amount of icing and use half of it for the centre and the rest to spread thickly on top.