Monday 17 November 2014

Spiced Apple Cake

Spiced Apple Cake

It feels almost as though everything I've been cooking and baking recently has involved apples. This year's crop has been spectacular not only for the quantity of the apples, but also the quality. There's been piles of huge, great, red-cheeked spheres all over the kitchen, awaiting their time to shine in chutneys, crumbles, pies, apple sauce. My fingers ache from peeling. 

Although the crumbles and chutneys have all been wonderful, my favourite use for this fragrant fruit however is apple cake. This year I have veered away from my usual recipe, dispensing with the walnuts which sometimes give a slightly bitter flavour to the cake. Instead, I've added muscovado sugar for a deeper, more rounded flavour and have upped the spices. The result is a lightly spiced, incredibly moist, delicious cake. I can't think of a time during the day when you wouldn't want a slice of this - breakfast, mid-afternoon, supper time - perfect.

As apples are still in season, I'm sending this over to Katie from Feeding Boys who this month is hosting Ren Behan's Simple and in Season challenge. 

 Simple and in Season

The spicing in this cake makes it ideal for this time of year so I'm also sending it over to Janie from The Hedgecombers who is this month's host of Tea Time Treats (Bonfire Night), a challenge she runs alongside original creator and host Karen from Lavender and Lovage.

Teatime Treat Linky Party logo


RECIPE

150g butter
90g caster sugar
90g muscovado sugar
180g self raising flour
1 teaspoon cinnamon 
1 teaspoon allspice
half a teaspoon ground nutmeg
3 eggs
3 medium-sized apples or 2 big ones, peeled, cored and chopped into small dice. 

Pre-heat the oven to 180°C

Grease and base line a round cake tin, 22cm diameter

Cream the butter and both kinds of sugar together. Add the eggs one at a time, whisking well after each addition. Sieve the flour and spices and fold in to the batter.

 Add the chopped apples, stirring well to combine.

Spoon the mixture into the prepared tin, smoothing the top.


If you want a slightly crunchy top, you can sprinkle over a spoon of demerara sugar just before it goes into the oven.

Put in the oven and bake for about 30-35 mins or until the cake is cooked and golden brown on top. It takes slightly longer to cook than a normal sponge cake because of the addition of moist apple.

Remove from the oven. Take the cake out of the tin as soon as possible (without burning yourself of course) and leave to cool on a wire rack.


Torta di Mela

Thursday 23 October 2014

Gorgonzola and Leek Risotto

Leek and Gorgonzola Risotto

The garden is covered with golden brown leaves, the wind is whistling through every crack and crevice in the house and I can finally get back to wearing my beloved boots, hats and gloves - yes, it's autumn and I love it. It also means that I can start making risotto again; I know there are summery risotto recipes out there but really, for me, it's a cold weather dish.

This one, creamy with gorgonzola, is perfect for these increasingly dark evenings. Make it when you've got the kitchen to yourself - then switch on the lights, pour yourself a glass of wine and watch the wild weather outside from your warm, cosy haven, whilst stirring the risotto and contemplating life.

I am sending this to Speedy Suppers, the blog challenge hosted by Sarah at Maison Cupcake and Katie at Feeding Boysas the theme this month is cheese.


I am also entering my risotto (with extra leeks) into Extra Veg, a blog challenge run by Helen from Fuss Free Flavours and Michelle (Utterly Scrummy) and hosted this month by Emily from A Mummy Too

Extra Veg event

RECIPE
Serves 2 generously

2 leeks
50g butter
1 teaspoon olive oil
1 glass dry white wine
1 litre hot vegetable stock
250g carnaroli or arborio rice
120g Gorgonzola
10g parmesan, grated

Chop the leeks very finely. Melt the butter with the oil in a wide saucepan, add the leeks and cook gently until softened, being careful not to colour them as leeks can turn very bitter if they start to brown.

When the leeks are soft, tip in the rice and stir well so that all the grains are coated in the buttery juices. Turn up the heat to medium and pour in the wine. Keep stirring until it is absorbed.

Start adding the stock, a ladleful at a time, making sure it is all absorbed before adding the next, stirring all the while to make sure the rice doesn't start to stick.

The rice should be cooked after about 18 minutes (it should still have a slight 'bite' to it). You might not need all the stock or you may need a little more (you could just add boiling water).

Add the blue cheese, roughly crumbling it in and stirring so that it melts into the risotto. You can also beat in the parmesan at this point or you can sprinkle it over just before eating if you prefer.


Gorgonzola Risotto

Monday 22 September 2014

Coppa and Rocket Pizza

Coppa and rocket pizza

Although I love my job, it's always a bit of a struggle to ease myself back into the routine of work after a long, pleasure-filled summer holiday. However, after several years I think I've managed to hone my techniques to ensure a smooth transition with minimal post-holiday trauma. Take clothes for example: going straight from the sandal-and-short wearing days of summer to full-on formal work wear is guaranteed to lead to a feeling of melancholy. A gradual change is needed, replacing first sandals with shoes, then linens with heavier materials and longer sleeves until by mid-September, you're back in suits and jackets as though you've never worn anything else. 

The other important aspect to consider is food and drink. In my opinion, September, like January, is not a good month for making any new resolutions regarding alcohol or healthy eating. If you are suffering badly from back-to-work blues, aperitifs and cocktails in the garden are a great way of getting back in a holiday mood, even when there's work the next day. Food should be fun and frivolous - don't make the mistake of going straight into winter with heavy, rib-sticking stews and roasts. 

This pizza is perfect for September. It's good for prolonging a holiday feeling but is also substantial enough to take you comfortably through the darkening evenings. This particular topping, discovered recently on a trip back to Italy, combines the meaty flavour of coppa (a bit like prosciutto but using a different cut) with the peppery tang of rocket. It works wonderfully well and has become my current favourite. If you can't find coppa, prosciutto works well too.

Teatime Treat Linky Party logoThe theme for this month's Tea Time Treats is Mediterranean and as savoury dishes are allowed, I'm sending this one along; the challenge is hosted by Karen at Lavender and Lovage and Janie (this month's host) at The Hedgecombers.


Please don't think that it's not worth making your own pizza. The difference between real pizza and store-bought is incredible, they're like two different things. Also, it's really straightforward, does not take hours of kneading and is very rewarding. You don't need any special equipment apart from a couple of pizza trays and a very hot oven. 

RECIPE (makes enough for 3 or 4 pizzas)

For the dough

450g strong white bread flour, plus more for kneading
7g (1 sachet) easy blend yeast
1 teaspoon salt
approximately 300 ml warm water
1 tablespoon olive oil

 Put the flour, yeast and salt in a large bowl and pour in about 200 ml of the water and the olive oil, mixing with your hands. Be prepared to add more water but do it gradually - you don't want it too wet (although it's not a disaster if this happens, just add more flour until you can knead it without it sticking to everything). Start kneading by pushing the dough away from you with the heel of your hand, the fold it back and turn slightly. Keep doing this for about 10 minutes, it should feel smooth and springy when it's ready.

Form the dough into a ball and rub a little olive oil over the surface, so that it is lightly greased. Put it into a clean bowl, cover with clingfilm and leave in a warm place for at least 2 hours, I've left it a lot longer than this and it doesn't seem to be a problem. The dough should more or less double in size.

When you're ready to make the pizza, preheat the oven to the hottest possible setting  (240°C on mine). Divide the dough into four roughly equal parts (you can weigh them if you want to be really precise) and roll each one out. It may seem far too small to fit into your pizza tray and it will keep springing back first of all but do persevere. If you don't want it that thin, you can divide the dough into three parts rather than four.

TOPPING (per pizza)

About 2 tablespoons of passata
125g mozzarella (I use the normal mozzarella for pizza, not buffalo), thinly sliced
Drizzle of extra virgin olive oil

After it's been cooked:
4 slices of coppa
a handful of rocket leaves

Lightly grease the pizza trays and stretch the dough to fit. Then cover with the passata (it should just be a very thin layer), a pinch of salt and a sprinkle of oregano. Add the cheese, drizzle over the olive oil and put in the oven. It takes about 10 minutes to cook but keep an eye on it as all ovens vary. After about 8 minutes, I take the pizza off the tray and slide it back directly onto an oven shelf for the last minute or two.

Put the coppa and rocket on the pizza after it's been cooked, drizzle with extra virgin olive oil and serve.
Pizza

Sunday 10 August 2014

Strawberry Vanilla Loaf Cake

Strawberry Loaf Cake

After the success of my strawberry muffins back in June, I've become slightly obsessed with using this fruit in baking. The heat works its magic on the strawberries, turning the already delicious flavour into a jammy, scented treat. 

I've spoken before about how much I love loaf cakes; deceptively simple, the best ones are moist, buttery and bursting with flavour. This recipe does not disappoint - beautifully textured, the strawberries and vanilla work so well together, resulting in loaf cake perfection. 

This cake is ideal for al fresco eating - it's got a bold flavour, it's easy to transport and even easier to slice and devour! So I'm sending it over to this month's Tea Time Treats Picnic challenge; the challenge is hosted by Karen (this month's host) at Lavender and Lovage and Janie at The Hedgecombers.

Tea Time Treats

As strawberries are still in season, I'm also entering it in to the Simple and in Season challenge, devised by Ren Behan and hosted this month by Elizabeth from the wonderful Elizabeth's Kitchen Diary.

Simple and in Season

RECIPE

125g butter, room temperature
160g caster sugar
2 eggs
175g self-raising flour
3 tablespoons buttermilk
1 teaspoon vanilla extract
200g strawberries

Pre-heat the oven to 180°C

Grease and base line a loaf tin, 23 x 13 x 7 cm 

Wash the strawberries carefully, dry, hull and cut into quarters. 

Cream the butter and sugar together. Add the eggs one at a time, whisking well after each addition. Stir in the vanilla extract.

After weighing out the flour, remove one tablespoon (this is used to toss with the strawberries before adding them to the batter). Sieve the rest of the flour and fold in to the cake mixture. Mix in the buttermilk. 

Toss the prepared strawberries in the left-over tablespoon of flour (this prevents it from all sinking to the bottom during baking) and fold in to the cake batter.

Spoon the mixture into the prepared tin, smoothing the top.

Put in the oven and bake for about 45 mins or until the cake is cooked and golden brown on top. It takes longer to cook than a normal sponge cake because of the addition of the strawberries.

Remove from the oven and leave to cool in the tin for about 20 mins before carefully turning out and leaving to cool on a wire rack. 


This cake makes a perfect pudding eaten still warm from the oven, served with crème anglaise. As a cake, it's wonderful too and in fact tastes even better after a day or two - very handy for a summer picnic.


Strawberry Vanilla Loaf Cake

Thursday 17 July 2014

Pea and Mint Soup

Pea and Mint Soup

A little morning ritual I've been enjoying in this gorgeous summer weather is having my breakfast espresso sitting on a bench in the garden, before heading off to work. I sip my coffee, listen to the birds, feel the sun on my face and survey the garden. 

The bench is next to my little herb corner so the coffee aroma from my espresso mingles with the heady smells of rosemary, thyme and mint. They all seem to be flourishing this year. Indeed, it was seeing that the mint was about to take over everything else that led me to make this delicious, summery, fragrant soup and although I was very liberal in my use of mint, it doesn't overpower the delicate flavour of the peas.

I am entering this soup into a few blog challenges this month:

Simple and in Season –  My Custard Pie (this month's host) & Ren Behan

Simple and in Season - enter your post on mycustardpie.com


No Croutons Required - Lisa’s Kitchen (this month's host) & Tinned Tomatoes


Four Season Food - Eat your Veg (this month's host) & Delicieux


Cooking with Herbs - Lavender & Lovage


RECIPE

1 tablespoon extra virgin olive oil
4 spring onions
700 ml water
500g frozen peas
1 big bunch fresh mint 

Start by boiling the water (in a kettle if you have one). 

Heat the olive oil in a large pan and add the spring onions, roughly chopped (I use the white and green parts). Stir and cook over a gentle heat for a minute so that the spring onions just start to soften.

Add the peas and the just-boiled water. Stir everything together and simmer for about 6 minutes, stirring occasionally.

Strip the leaves off the mint and roughly chop. Add to the soup and continue cooking for a further minute or two. 

Using either a stick blender or normal blender, whizz it all up until you get the consistency you desire. I like it with a bit of texture. Season with salt and pepper.

Serve with a few fresh mint leaves and a swirl of yoghurt or olive oil on top if you like. I usually eat this soup hot but it's also really nice cold. 

Pea soup

Sunday 22 June 2014

Strawberry and Orange Muffins

Strawberry Muffins

It's been a beautiful June. I've been gorging myself on asparagus and strawberries, dining outside, going for long country walks and bike rides and sunning myself in the garden - bliss. 

I made these muffins this morning, for an al fresco breakfast. The strawberries were some that I had left in the fridge and were slightly past their best for eating normally. The buttermilk was also left over from a chocolate cake I made earlier in the week so satisfyingly, I was able to use that too. 

The muffins smelled wonderful as they were baking, the strawberries giving that heady, jammy perfume. The taste was exceptional, sweet and moist, balanced with a lovely acidity from the orange zest. 

As this recipe neatly used up some old strawberries and buttermilk, I'm sending this off to the No Waste Food Challenge. It's being hosted by Michelle of Utterly Scrummy Food for Families on behalf of Elizabeth's Kitchen.

I'm also sending this off to Four Seasons Food over at The Spicy Pear where the theme is the Colour Red this month. It's normally hosted over at Delicieux or Eat Your Veg.


Finally, I'm pleased to be entering it into a new challenge, Bake of the Week over at Casa Costello.


RECIPE 

225g plain flour
160g caster sugar
2 and a quarter teaspoons baking powder
half a teaspoon bicarbonate of soda
half a teaspoon of salt
250ml buttermilk
55g unsalted butter, melted and cooled
grated zest of one orange
1 egg, beaten
about 130g fresh strawberries, roughly chopped

Preheat the oven to 180ºC. Line a muffin tin with paper liners.

Sift the flour, sugar, baking powder, bicarb of soda, and salt into a large bowl and mix together. I add the chopped strawberries at this point too because I found that if I added them last of all, they didn't mix in as well. Adding them at this stage means that they are evenly dispersed throughout the muffins.

In a separate bowl, mix together the buttermilk, melted butter, orange zest, and egg. Make a hole in the centre of the dry ingredients and pour the wet ingredients in. Mix with a fork just until blended, being careful not to over mix. With a standard ice-cream scoop or a large spoon, scoop the batter into the prepared cases, filling them almost full.

Bake the muffins for 20 to 25 minutes, until golden brown.


Strawberry and Orange muffins

Sunday 25 May 2014

Chocolate Syrup Cake for £1

Chocolate Syrup Cake

When I read about Choclette's We Should Cocoa (WSC) challenge for May, I knew I had to try and take part. I'm often unable to participate in WSC but it's a much-loved and incredibly popular challenge and I always enjoy seeing what people have made. Choclette decided to really challenge everyone this month by asking us to make a chocolate cake for £1, in line with the current focus on global poverty. 

Like many others, I found this challenge quite thought-provoking and have really enjoyed doing the research for it. Again, like most people, I soon realised that my usual cake base of butter and free-range eggs was not going to be feasible, so I had to think about alternatives. I know that margarine costs a lot less than butter but it's something that I'm really not keen on using, so the only option was to use oil. I mean, I've used oil in cakes before but usually just vegetable-based cakes such as carrot cake and pumpkin cake. Using oil in a chocolate cake was something I'd never contemplated. I also had to buy the very cheapest option for all the cake ingredients otherwise I would never have been able to manage it. I based my recipe on one I'd seen on the BBC Good Food website which you can see here. 

The results were a revelation. The cake was really delicious. I mean, nicer than my usual standard chocolate cake and a cinch to make. When it came out of the oven, it was moist and tender-crumbed with a slightly crisp exterior, just begging to be eaten (and I did indeed sample it while it was still warm). It also lasted incredibly well, staying moist and fresh much longer than a butter-based sponge. Without any budget restrictions, I would have added some vanilla essence to the batter and maybe replaced the milk with buttermilk. 

I have to confess that the total cost of the cake came to £1.01 and that doesn't include the icing sugar on top but I am still quite proud of my results. I'd like to thank Choclette for such a great challenge; my outdoor cake photos were taken in homage to her wonderful garden photography.


I'm pleased to be able to enter this in Camilla (Fab Food 4 All) and Helen's (Fuss Free Flavours) Credit Crunch Munch challenge, hosted this month by Gingey Bites.


This is also making its way over to Vanesther at Bangers and Mash for this month's Family Foodies challenge (which she runs jointly with Louisa from Eat Your Veg), entitled 'Cheap and Cheerful'


RECIPE

Ingredients and cost breakdown
175g self raising flour (5p)
1 tablespoon cocoa (5p)
1 level teaspoon bicarbonate of soda (2p)
140g caster sugar (14p)
2 eggs (30p)
150ml sunflower oil (21p)
150ml milk (7p)
2 tablespoons golden syrup (17p)

Pre-heat the oven to 180°C

Grease and base line a round cake tin, 20cm diameter

Sieve together the flour, bicarb and cocoa into a large bowl (or the bowl of your mixer). Add the sugar and mix. Add the oil, milk, syrup and eggs and beat until smooth. 

Spoon the mixture into the prepared tin, smoothing the top.

Put in the oven and bake for about 35-40 mins or until the cake is cooked and a cake tester comes out clean. 

Remove from the oven and leave to cool in the tin for about 20 mins before carefully turning out and leaving to cool on a wire rack. 


If you're not on a budget, you could also ice this cake but I have to say that with just a dusting of icing sugar, it was pretty much perfect.

Chocolate Syrup Cake

Tuesday 13 May 2014

Penne with Speck and Leeks


Penne with Speck and Leeks

Another very busy period at work has left me little time for blogging but a recent lull has meant I've been able to catch up on some of my favourite blogs and so have found out about all those doing the fantastic Live Below the Line challenge. This asks people from all over the world to join the Global Poverty Project initiative in living on £1 a day for five consecutive days. Vanesther over at Bangers and Mash has successfully completed the challenge and her posts about it certainly make for interesting reading. She has decided to extend the frugal food theme to this month's Family Foodies challenge (which she runs jointly with Louisa from Eat Your Veg), entitled 'Cheap and Cheerful' so I'm sending this pasta dish over as it fits the bill perfectly. It's simple, delicious and has universal appeal which makes it ideal for a family meal. The leeks give a wonderful flavour and although the speck (an Italian smoked prosciutto, sometimes sold in the UK as Black Forest ham) is quite expensive, you only need a couple of slices to ensure that the wonderful smoky flavour of the ham permeates the pasta.

family-foodies

RECIPE- serves 3-4

2 tablespoons olive oil
4 leeks

1 clove garlic
1 tablespoon crème fraîche or sour cream
4 slices Italian speck/Black Forest ham, finely sliced
400g penne or other short pasta

Start by preparing the leeks.  As they can be very dirty, I usually slice them in half length ways and then chop them finely. Put them in a colander and wash thoroughly under running water. Drain well. 


Heat the oil in a large frying pan, add the leeks and cook gently until softened, being careful not to colour them as leeks can turn very bitter if they start to brown. Add the crushed garlic and continue cooking for a minute or two.

Stir through the crème fraîche. Add salt and black pepper to taste.

In the meantime, cook the pasta in a large pan of salted water, as per packet instructions. Near the end of the cooking, take a ladleful of the pasta cooking water and add to the leeks. When the pasta is al dente, drain well and mix with the leeks.  Add the finely sliced speck (I usually just scissor it in) and mix briefly. If you're not watching the purse strings, serve the pasta with lots of freshly grated parmesan. 


Leek and Speck Pasta

Monday 24 March 2014

Spring Vegetable Pasta Gratin

Pasta al gratin primavera

I often have odd vegetables lurking in the bottom of my fridge. By odd, I don't mean peculiar or rudely shaped, I just mean that I end up with a variety of different vegetables, but only small amounts of each. In an effort to reduce my food waste, I try to create delicious meals that use up these forlorn perishables.

This gratin worked really well and not only allowed me to use up all the vegetables in my fridge, but I even managed to finish some double cream that had been getting perilously near its use-by date as well. It's a lovely dish for spring, with the fresh, multi-coloured vegetables providing a soft contrast to the golden topping.

I'm sending this over to Chris at Cooking Around the World, who is hosting the No Waste Food Challenge this month on behalf of Elizabeth, of Elizabeth's Kitchen Diary.

No Waste Food Challenge

RECIPE - serves 4 

320g pasta (any 'short' pasta will do, I've used penne but shells would be good too)
1 carrot
1 courgette
1 leek
100g lettuce
100g cabbage
1 tablespoon vegetable stock
20g butter
1 tablespoon olive oil
150 ml double cream
100 ml milk
140g fresh Parmesan, grated
handful of chives, chopped

Wash all the vegetables thoroughly. Dice the carrot and courgette, slice the leek, lettuce and cabbage. Heat the butter and olive oil in a frying pan and cook all the vegetables for a few minutes until beginning to soften. Add the vegetable stock, and salt and pepper to taste and continue cooking for about 10 minutes, adding the chopped chives at the end.

Heat the cream and milk in a pan for a few minutes to thicken slightly, then add 100g of the grated Parmesan, salt and pepper. 

In the meantime, cook the pasta in lots of boiling salted water until just al dente. Drain it well and mix with the vegetables. In a greased ovenproof dish, alternate layers of the pasta and vegetables with the creamy sauce and the rest of the Parmesan, finishing with a generous sprinkling of the cheese. 

Put in a pre-heated hot oven (180°C) for 10 mins, then increase the heat to 240°C for a further 10 mins. When it's ready it should be golden, crispy and bubbling. 

Vegetable Pasta Gratin

Monday 10 March 2014

CARTE NOIRE ESPRESSO CAPSULES AND TWO COFFEE RECIPES FOR DESSERT!


Ecstatic is not too strong a word to describe how I felt when I was told that I had the opportunity to taste and review the new Carte Noire Espresso Collection for Nespresso* machines. And the feeling only intensified over the following days when I received the exciting collection and started to sample the coffee (although the vast quantities of caffeine surging through my veins may have had something to do with this). As well as the four boxes of espresso capsules, the beautiful black box also contained glossy tasting notes and two Bodum espresso glasses (seen in the photos), cleverly designed to insulate the coffee, keeping it hot.

Carte Noire for Nespresso

The number one French coffee brand Carte Noire has always been firmly positioned at the luxury end of the market and its latest foray into espresso capsules for Nespresso machines can only consolidate its place. The new range features four distinct flavours, each with its own special character and intensity; the higher the number, the higher the intensity. They are available to buy in supermarkets with an RRP of £2.79 for a box of ten. 

I am an unashamed coffee drinker and espresso is always my coffee of choice so I thoroughly enjoyed my tasting session. GL, another espresso lover, tasted with me and I also involved my parents, as they have been Nespresso users for a number of years now. We did not do a blind tasting as we wanted to make sure that we started with the most delicate and ended with the most intense. Once the espresso was made, we sniffed, to detect the aroma, then we slurped and savoured. All the coffee was drunk unadulterated, without any sugar or milk so as not to affect the flavours.

Below are my tasting notes and comments about each espresso, followed by the official descriptions from Carte Noire, in italics. We decided not to read their notes until after we had done our tasting. At the end, you can also find two recipes I developed using this range. The first is a coffee and dark chocolate semi-freddo and the second, an iced tiramisu that can be served either as a dessert or as a refreshing summer drink. 

Carte Noire Espresso Tasting

The first thing I noticed is that each capsule is individually wrapped. The reason for this becomes clear as soon as you open the packet and you get a hit of intense ground coffee aromas. With other capsules, this does not happen and I think it makes a huge difference to the whole experience. The aromas set your taste buds tingling and fill the kitchen with that unmistakable just-ground coffee smell. 

The second thing to note is how easy it is to use the capsules. Just pop one in the machine, press the button and voila, a perfect espresso every time. The entire range uses only pure Arabica coffee and all flavours produced espresso with good body and substance and an excellent thick crema which can be seen in the photos.

Carte Noire Espresso

  • N°3 Élégant: Smooth and mellow, but nicely full-bodied, we all agreed that this would be an ideal early morning coffee. My dad in particular really enjoyed this one.                                               "... is a delicate, light and velvety coffee, with a warm touch of biscuity notes. With an enticing aroma of ripening corn, this full-bodied coffee is smooth, balanced and satisfying. A no nonsense 'easy to drink' coffee"   
                
  •  N°5 Délicat: This one had a wonderful aroma, rich and slightly fruity. The taste was quite unusual  with a slight acidity that we all enjoyed. My dad also detected a hint of smokiness in the taste. This coffee could easily be drunk throughout the day. This is the coffee I used in the iced tiramisu as the delicate flavour doesn't overpower the creamy vanilla taste.                                                                 "Lively, zesty and tangy, this coffee has a delicate wine like acidity that seduces and delights the palate. Enjoy a refreshing, mild and delicate espresso with a seamless blend of mellow lemon acidity"

  • N°7 Aromatique: This smelt rich and enticing and had a slightly darker colour than the first two. My mum used the adjective 'nutty' to describe the taste and was very pleased to see it described as such in the official tasting notes! I thought there was a hint of chocolate in it too. This was GL's favourite and came a close second for me. It's perfect after lunch or as a mid-afternoon pick-me-up. I also chose this one to use in my semi-freddo.                                                                                           "This blend has true character; rich, complex and earthy, with delicate nutty and caramel undertones. With a deep flavour delivery, this is a pleasurable and pleasing strong full bodied espresso"

  •   N°9 Intense: A rich, intense aroma could be detected as soon as this espresso had been made. This was full-flavoured and strong but without any bitterness. It was also the coffee that elicited the most description from everyone, with words like woody (mum), smoky (me) and tobacco (GL), all flavours mentioned in the Carte Noire notes. Dad decided on 'strong but smooth'. This was the favourite for both mum and I and is ideal as an after-dinner coffee although personally, I've been enjoying it throughout the day since I got it.                                                                                             "Flamboyant, with an abundance of strong, full flavours, this is an opulent coffee. Rich in 'cigar box' flavours such as smoke, wood and tobacco, this coffee is bold, stimulating and aromatic." 

Overall rating
I was extremely impressed with all the varieties in this collection and I will certainly purchase them in the future as I thought that the coffee flavours and aromas were superior to the capsules I usually use in my Nespresso machine. So watch out George, you've got competition.


RECIPE - Semifreddo al Caffé/Coffee Semi-freddo with Dark Chocolate Chunks


Coffee Semi-Freddo


I decided to use N°7 Aromatique for this recipe as the chocolate/cocoa tones of the coffee work perfectly with the dark chocolate. It's a wonderful dessert, creamy and rich but surprisingly light at the same time. The chocolate adds another dimension, providing a welcome crunch to the smooth iced cream. It is ideal to make when you've got people for dinner as it can be completely made in advance, then just left in the freezer until you want to serve it. It's also really easy to make, you just need a lot of bowls! I actually like it really frozen but most people suggest leaving a semi-freddo out for about 10 minutes before eating so that it softens slightly. 

2 eggs
40g caster sugar
1 Carte Noire espresso (40ml), cooled
250ml double cream
pinch of salt
1 teaspoon vanilla extract
170g dark chocolate, roughly chopped

Serves about 5 -6 people.

Separate the eggs and beat the yolks and half the sugar using an electric whisk until thick and pale yellow (about 5 mins). Gently fold in the espresso and vanilla extract.

In another bowl, whip the cream until it forms soft peaks.

In yet another bowl, whisk the egg whites with a pinch of salt until the soft peak stage, then add the rest of the caster sugar gradually, still whisking (like a meringue) until it is stiff and glossy.

Fold the whipped cream into the yolk mixture and then add the chopped chocolate. Finally, fold in the egg whites very gently.

Pour the mixture into a serving dish. You can use whatever you want really but I like to use a loaf tin, lined with clingfilm as you can then remove it easily from the tin when frozen and serve it in slices. 

Freeze overnight. To serve, remove from the tin, allow to thaw slightly (although see note above) and slice. I love it as it is but you could serve it with some thin, crisp biscuits and even a chocolate sauce if you wish.


RECIPE - Iced Tiramisu

This is incredibly simple, the work of minutes, and yet it works perfectly and does have the taste of a tiramisu (with far less effort). You really do need great coffee to start with though - I used  Carte Noire N°5 Délicat which was perfect. 


Serves 1-2

1 generous scoop of good quality vanilla or stracciatella (vanilla with chocolate chips) ice-cream
1 Carte Noire espresso, cooled
1 teaspoon brandy (optional)
Savoiardi (ladyfinger) biscuits to serve
Grated chocolate (optional)

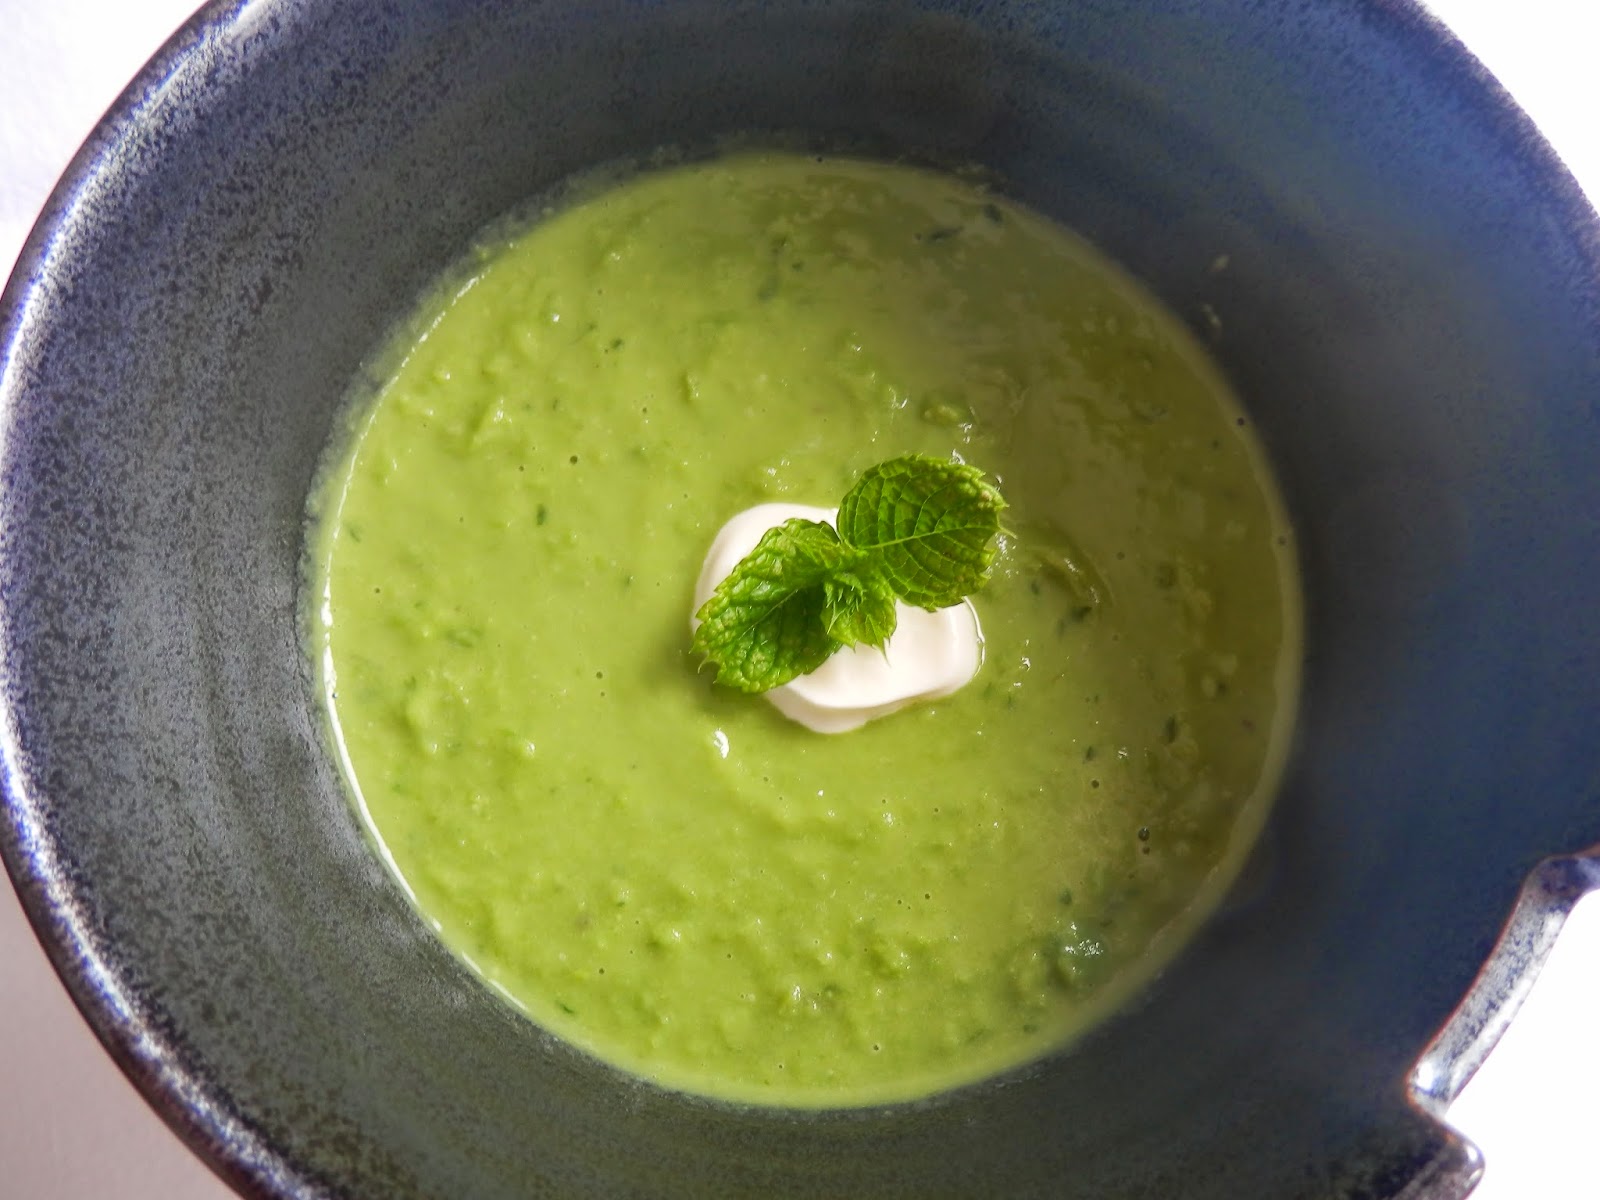
Pour the espresso and brandy (if using) over the ice-cream and blend until smooth. Pour into pretty glasses, scatter with the grated chocolate (I didn't for the ones in the photo as I had used stracciatella ice-cream which includes the chocolate element already) and serve with the biscuit for dipping. 


This is a sponsored post - Leeks and Limoni was sent the espresso capsules free of charge to sample and review. All views and opinions are my own.

This post is an entry in the Foodies100 Espresso Collective Challenge, sponsored by Carte Noire. Each box of Carte Noire Espresso capsules contain 10 single servings and are available in supermarkets at an RRP of £2.79 and are available in four intensities. To find out more about the new Carte Noire Collection Espresso click here 

*Nespresso® is a registered trademark of a third party without any link with Mondelez International group. Compatible with all Nespresso®* machines bought before July 1, 2013. After that date, compatible with most Nespresso®* machines bought. For additional information regarding compatibility, please see UK: www.CARTENOIRE.co.uk/compatibility