Showing posts with label Simple and In Season. Show all posts

Monday, 17 November 2014

Spiced Apple Cake

Spiced Apple Cake

It feels almost as though everything I've been cooking and baking recently has involved apples. This year's crop has been spectacular not only for the quantity of the apples, but also the quality. There's been piles of huge, great, red-cheeked spheres all over the kitchen, awaiting their time to shine in chutneys, crumbles, pies, apple sauce. My fingers ache from peeling. 

Although the crumbles and chutneys have all been wonderful, my favourite use for this fragrant fruit however is apple cake. This year I have veered away from my usual recipe, dispensing with the walnuts which sometimes give a slightly bitter flavour to the cake. Instead, I've added muscovado sugar for a deeper, more rounded flavour and have upped the spices. The result is a lightly spiced, incredibly moist, delicious cake. I can't think of a time during the day when you wouldn't want a slice of this - breakfast, mid-afternoon, supper time - perfect.

As apples are still in season, I'm sending this over to Katie from Feeding Boys who this month is hosting Ren Behan's Simple and in Season challenge. 

 Simple and in Season

The spicing in this cake makes it ideal for this time of year so I'm also sending it over to Janie from The Hedgecombers who is this month's host of Tea Time Treats (Bonfire Night), a challenge she runs alongside original creator and host Karen from Lavender and Lovage.

Teatime Treat Linky Party logo


RECIPE

150g butter
90g caster sugar
90g muscovado sugar
180g self raising flour
1 teaspoon cinnamon 
1 teaspoon allspice
half a teaspoon ground nutmeg
3 eggs
3 medium-sized apples or 2 big ones, peeled, cored and chopped into small dice. 

Pre-heat the oven to 180°C

Grease and base line a round cake tin, 22cm diameter

Cream the butter and both kinds of sugar together. Add the eggs one at a time, whisking well after each addition. Sieve the flour and spices and fold in to the batter.

 Add the chopped apples, stirring well to combine.

Spoon the mixture into the prepared tin, smoothing the top.


If you want a slightly crunchy top, you can sprinkle over a spoon of demerara sugar just before it goes into the oven.

Put in the oven and bake for about 30-35 mins or until the cake is cooked and golden brown on top. It takes slightly longer to cook than a normal sponge cake because of the addition of moist apple.

Remove from the oven. Take the cake out of the tin as soon as possible (without burning yourself of course) and leave to cool on a wire rack.


Torta di Mela

Sunday, 10 August 2014

Strawberry Vanilla Loaf Cake

Strawberry Loaf Cake

After the success of my strawberry muffins back in June, I've become slightly obsessed with using this fruit in baking. The heat works its magic on the strawberries, turning the already delicious flavour into a jammy, scented treat. 

I've spoken before about how much I love loaf cakes; deceptively simple, the best ones are moist, buttery and bursting with flavour. This recipe does not disappoint - beautifully textured, the strawberries and vanilla work so well together, resulting in loaf cake perfection. 

This cake is ideal for al fresco eating - it's got a bold flavour, it's easy to transport and even easier to slice and devour! So I'm sending it over to this month's Tea Time Treats Picnic challenge; the challenge is hosted by Karen (this month's host) at Lavender and Lovage and Janie at The Hedgecombers.

Tea Time Treats

As strawberries are still in season, I'm also entering it in to the Simple and in Season challenge, devised by Ren Behan and hosted this month by Elizabeth from the wonderful Elizabeth's Kitchen Diary.

Simple and in Season

RECIPE

125g butter, room temperature
160g caster sugar
2 eggs
175g self-raising flour
3 tablespoons buttermilk
1 teaspoon vanilla extract
200g strawberries

Pre-heat the oven to 180°C

Grease and base line a loaf tin, 23 x 13 x 7 cm 

Wash the strawberries carefully, dry, hull and cut into quarters. 

Cream the butter and sugar together. Add the eggs one at a time, whisking well after each addition. Stir in the vanilla extract.

After weighing out the flour, remove one tablespoon (this is used to toss with the strawberries before adding them to the batter). Sieve the rest of the flour and fold in to the cake mixture. Mix in the buttermilk. 

Toss the prepared strawberries in the left-over tablespoon of flour (this prevents it from all sinking to the bottom during baking) and fold in to the cake batter.

Spoon the mixture into the prepared tin, smoothing the top.

Put in the oven and bake for about 45 mins or until the cake is cooked and golden brown on top. It takes longer to cook than a normal sponge cake because of the addition of the strawberries.

Remove from the oven and leave to cool in the tin for about 20 mins before carefully turning out and leaving to cool on a wire rack. 


This cake makes a perfect pudding eaten still warm from the oven, served with crème anglaise. As a cake, it's wonderful too and in fact tastes even better after a day or two - very handy for a summer picnic.


Strawberry Vanilla Loaf Cake

Thursday, 17 July 2014

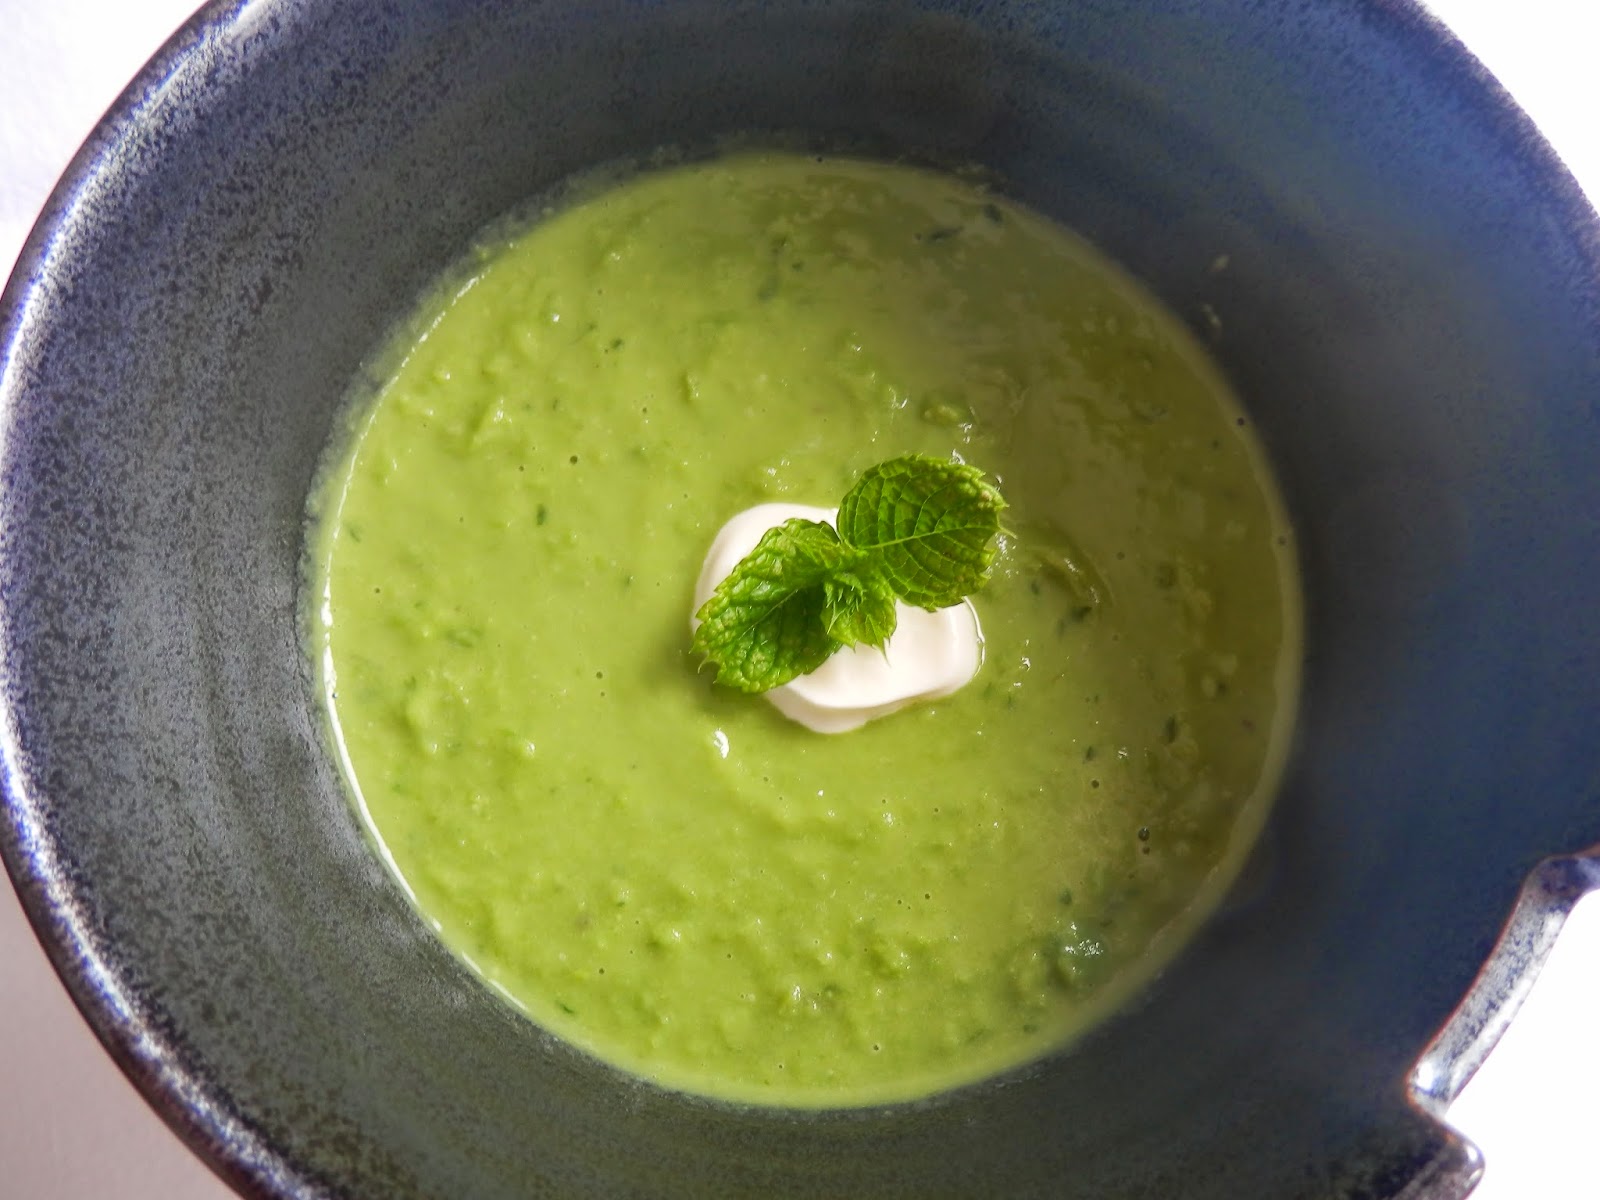
Pea and Mint Soup

Pea and Mint Soup

A little morning ritual I've been enjoying in this gorgeous summer weather is having my breakfast espresso sitting on a bench in the garden, before heading off to work. I sip my coffee, listen to the birds, feel the sun on my face and survey the garden. 

The bench is next to my little herb corner so the coffee aroma from my espresso mingles with the heady smells of rosemary, thyme and mint. They all seem to be flourishing this year. Indeed, it was seeing that the mint was about to take over everything else that led me to make this delicious, summery, fragrant soup and although I was very liberal in my use of mint, it doesn't overpower the delicate flavour of the peas.

I am entering this soup into a few blog challenges this month:

Simple and in Season –  My Custard Pie (this month's host) & Ren Behan

Simple and in Season - enter your post on mycustardpie.com


No Croutons Required - Lisa’s Kitchen (this month's host) & Tinned Tomatoes


Four Season Food - Eat your Veg (this month's host) & Delicieux


Cooking with Herbs - Lavender & Lovage


RECIPE

1 tablespoon extra virgin olive oil
4 spring onions
700 ml water
500g frozen peas
1 big bunch fresh mint 

Start by boiling the water (in a kettle if you have one). 

Heat the olive oil in a large pan and add the spring onions, roughly chopped (I use the white and green parts). Stir and cook over a gentle heat for a minute so that the spring onions just start to soften.

Add the peas and the just-boiled water. Stir everything together and simmer for about 6 minutes, stirring occasionally.

Strip the leaves off the mint and roughly chop. Add to the soup and continue cooking for a further minute or two. 

Using either a stick blender or normal blender, whizz it all up until you get the consistency you desire. I like it with a bit of texture. Season with salt and pepper.

Serve with a few fresh mint leaves and a swirl of yoghurt or olive oil on top if you like. I usually eat this soup hot but it's also really nice cold. 

Pea soup

Saturday, 22 February 2014

Tagliatelle with Leeks and Sausage - Tagliatelle con Porri e Salsiccia

Leek and Sausage Tagliatelle

This is one of those great Italian dishes that manages to transform a few humble ingredients into a deliciously satisfying dinner. Apart from the pasta, there are just two main elements, sausages and leeks. Add some garlic and seasoning and a glug or two of olive oil and that's it basically. It's simple, delicious and has universal appeal which makes it perfect for a family meal. It's also pleasingly frugal - one regular sized pack of sausages, along with a few leeks, makes enough pasta for four generous adult servings.

I'm pleased to be able to enter this in Camilla (Fab Food 4 All) and Helen's (Fuss Free Flavours) Credit Crunch Munch challenge, hosted this month by Angela at My Golden Pear.

Credit-Crunch-Munch-Just-Pic

As this recipe nicely used up my glut of leeks, (grown about 10 miles from my house) I'm also sending it over to Fiona of London Unattached who is hosting the No Waste Food Challenge this month on behalf of Elizabeth, of Elizabeth's Kitchen Diary.

No Waste Food Challenge

Leeks are at their best at this time of year so I'm sending this over to Ren for her Simple and in Season challenge.

Simple and in Season

RECIPE

2 tablespoons olive oil
3-4 leeks
1 clove garlic
375g good quality pork chipolata sausages
half a glass white wine
400g tagliatelle or pappardelle

Start by preparing the leeks and sausages. As leeks can be very dirty, I usually slice them in half length ways and then chop them finely. Put them in a colander and wash thoroughly under running water. Drain well. 

For the sausages, remove the skins, break off small amounts of sausage mixture and form into small balls. 

Heat the oil in a large frying pan, add the leeks and cook gently until softened, being careful not to colour them as leeks can turn very bitter if they start to brown. Add the crushed garlic and continue cooking for a minute or two.

Remove the leeks to a plate and add the sausage meatballs to the pan. You don't need to add any extra oil at this point, there will be enough left over from the leeks. Cook for a few minutes over a medium heat until the meatballs are lightly browned all over. Add the leeks to the sausage meatballs in the pan and pour over the wine. Stir everything together and check the seasoning. I usually add a lot of freshly ground pepper as I think it goes really well with leeks.  Continue cooking for about 5 minutes or so until most of the wine has evaporated and the sausages are cooked through.

In the meantime, cook the pasta in a large pan of salted water, as per packet instructions. Near the end of the cooking, take a ladleful of the pasta cooking water and add to the leeks and sausage mixture if you think it looks slightly dry. When the pasta is al dente, drain well and mix with the leeks and sausages. Serve with lots of freshly grated parmesan. 


Tagliatelle con salsiccia e porri

Tuesday, 18 June 2013

Raspberry Bakewell Tart

Raspberry Bakewell Tart

Strawberries are undoubtedly the most popular fruit of summer. Juicy and luscious, with their shameless scarlet colour and heady fragrance, they are the Marilyn Monroe of the berry world. At their best, they are indeed a delight but their ubiquitous presence in every supermarket, greengrocer and corner shop from April to October can often bring disappointment, with tastes ranging from somewhat bland to downright insipid. Raspberries however rarely betray us. Their texture is consistently good, never watery or slushy, their delicate flavour sweet yes but tempered with a sour note, subtle, more complex on the palate, Grace Kelly perhaps or Katharine Hepburn.

Raspberries are used to great effect in this recipe. A classic Bakewell tart is shortcrust pastry, filled with raspberry jam and an almondy sponge. This version, based loosely on a Nigella recipe in How To Eat, intensifies the flavours by using almonds both in the frangipane filling and the pastry and providing a double hit of fruit by adding some fresh raspberries on top of the jam. The result is wonderful - light, crisp pastry; rich, buttery frangipane; sweet, tangy raspberry. Pudding perfection.

I'm linking this up to four blogging challenges. The first is the One Ingredient Challenge run by Nazima (this month's host) from Franglais Kitchen and Laura from How to Cook Good Food. Their theme for June is Raspberries and as I love them, I'm really looking forward to seeing everyone's ideas.

One Ingredient June Rasberries

The second is Ren Behan's Simple and In Season Challenge, another blog event that encourages us all to use local, fresh, seasonal produce.

Simple and in Season

The third is Calender Cakes, run by Rachel (this month's host) from Dolly Bakes and Laura from Laura Loves Cakes. The theme for June is Pump Up the Jam. 
Calendar Cakes Challenge
Finally, as this month's letter is 'R' in the brilliant Alphabakes challenge by Ros (this month's host) from TheMoreThanOccasionalBaker and Caroline  at Caroline Makes, I'm sending this as my entry. 


RECIPE

for the pastry
120g plain or 00 flour
40g icing sugar
20g ground almonds
85g butter
1 egg yolk

for the filling
150g fresh raspberries
2 tablespoons raspberry jam
3 eggs
125g butter, melted
125g caster sugar
125g ground almonds
a few drops almond extract
40g flaked almonds

For the pastry, chop the butter and put it in the freezer for about 10 minutes. Take it out and put it into a food processor together with all the other pastry ingredients except the egg yolk. With the double blade attachment, whizz until the mixture is the size of small peas. Then add the egg yolk and pulse until it just starts coming together. Dump out onto a board and form the mixture into a ball, flatten it down a little, wrap in cling film and let it rest in the fridge for 30 mins. 

Pre-heat the oven to 200°C. Lightly flour a work surface and roll the pastry out thinly and use it to line a 21cm round, loose-bottomed tin. Put it back in the fridge for at least 10 minutes while you make the filling. 

For the filling, beat the sugar, almond extract and eggs together. Then pour the melted butter in to the mixture, still stirring. Finally, mix in the ground almonds, beating well to eliminate any lumps. 

Remove the pastry case from the fridge and prick the bottom with a fork. Spread a thin layer of jam over the base and then cover evenly with the raspberries. Pour the frangipane over and sprinkle the flaked almonds on top.

Bake for about 40 mins until golden. Leave to cool for 10 mins in the tin, then carefully remove the outer ring and leave to cool further on a wire rack. You can serve the tart while still warm although it's good cold too.

Classic Bakewell Tart

Monday, 13 May 2013

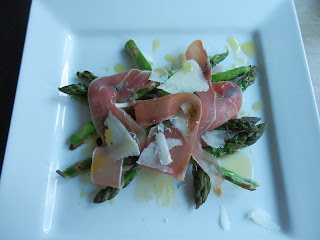
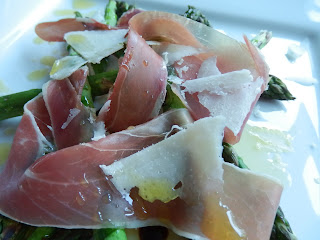
Warm Asparagus Salad with Prosciutto and Parmesan

Asparagus, Prosciutto and Parmesan Salad

It is a surprising thing for me to write but I think it's true when people say that you can have too much of a good thing. Our long weekend in Paris last week proved this point rather well. It was wonderful. I mean, it was Paris in spring time and you can't really get much better than that. Under blue skies, we walked and ate crêpes, we walked and stopped for coffee and pâtisserie, we walked and ate Ladurée macaroons, we walked and .... well, you get the idea. There was a lot of walking, a lot of rich food and oh yes, there was wine too.

Les Jardins des Tuileries, May 2013

It was a perfect weekend but it did have the effect of  leaving me longing for some lighter meals and salads, something with crisp green vegetables and refreshing flavours. This warm asparagus dish seemed appropriate. The spears are not boiled but chargrilled on a ridged pan which gives an intense smoky flavour that I love. Combined with the sweet prosciutto and salty parmesan, it makes a delicious spring starter or the ideal lunch after a weekend of  gluttonous excess.

I'm linking this up to two blogging challenges. The first is the One Ingredient Challenge run by Laura (this month's host) from How to Cook Good Food and Nazima from Franglais Kitchen. Their theme for May is Asparagus and as I love it, I'm really looking forward to seeing everyone's ideas.

One Ingredient

The other is Ren Behan's Simple and In Season Challenge, another blog event that encourages us all to use local, fresh, seasonal produce.

Simple and in Season


RECIPE - serves 2

250g asparagus  
4 slices prosciutto
about 30g fresh parmesan
extra virgin olive oil
balsamic vinegar

Wash the asparagus and snap off the tough, woody ends - they usually break naturally. You can trim them with a knife if you prefer to have all the spears the same length. Drizzle the spears with a little olive oil and place them on a very hot ridged pan. Cook for about 3 minutes on one side so they get nice grill lines and then turn them over using tongs. Cook for about the same amount of time on the other side.

Divide the asparagus between two plates and drizzle over some extra virgin olive oil and balsamic vinegar to taste. Tear the prosciutto into thin strips and drape over the asparagus. Use a potato peeler to make shavings of parmesan and let it fall naturally over the other ingredients. 

Drizzle over some more olive oil and serve while the asparagus is still warm. 

Warm Asparagus Salad

Wednesday, 7 November 2012

Butternut Squash Soup with chilli and herbs


I love cooking with butternut squash (as long as I don't have to peel it). The intense colour when you cut it in half always comes as a surprise and magic occurs with the heat of the oven, transforming the hard, unyielding flesh into soft, sticky sweetness. Even its name sounds delicious.

This soup is perfect for November - the vibrant orange adds colour to a grey day, the squash makes the soup satisfyingly filling but still silkily smooth, the herbs give freshness and the chilli really warms you up from the inside.

As squash is still very much in season, I'm sending this over to Ren at Fabulicious Food for her wonderfully inspiring Simple and In Season challenge.


I'm also sending this over to Javelin Warrior's weekly challenge, Made with Love Mondays which encourages us all to cook from scratch.

JWsMadeWLuvMondays

The herbs used in this dish mean that it can be sent to another of my favourite challenges, Herbs on Saturday, created by Karen from the consistently wonderful Lavender and Lovage and hosted this month by Jen at Blue Kitchen Bakes .

Herbs on Saturday

RECIPE - serves 4

1 butternut squash
1 onion
1 clove garlic
2 tablespoons olive oil
40g butter
dried chilli flakes, (a pinch or two, depending on how hot you want it)
2 sage leaves, finely chopped
900ml vegetable (or chicken stock)
a handful of fresh coriander

Pre-heat the oven to 220°C

Cut the unpeeled butternut squash in half, from top to bottom and deseed it. Make a few cuts in the flesh with a knife and drizzle with some olive oil. Place on a roasting tray and roast for about 40 mins until soft.

In the meantime, finely chop the onion and garlic. Heat the oil and butter in a saucepan and soften the onion and garlic slowly over a gentle heat. It's important to do this slowly as you really don't want the onion and garlic to burn or even colour. After about 20 mins the onion should be soft and translucent.

When the squash is cool enough to handle, scoop out the flesh (discarding the skin) and add it to the softened onions and garlic, together with the sage, chilli and stock. Bring it to the boil and cook for a few minutes before removing from the heat.

With a stick blender, blitz until smooth and check the seasoning. It will probably need both salt and pepper, depending on the stock you have used and personal taste.

Put the soup back on the hob to heat up thoroughly. Serve with generous quantities of fresh coriander and a drizzle of crème fraîche.


Wednesday, 24 October 2012

Chocolate and Pumpkin Cake


I feel I must start with an apology - this is the second chocolate cake I have written about in less than a month (click here for mini chocolate cakes with nutella cream). However, as the cakes are completely different in terms of taste, texture and when you would want to eat them, I think that its inclusion here is justified. The seasonal use of pumpkin is another reason for adding it to October's recipes.

Although most people are familiar with pumpkin in tarts and pies, it may seem an odd ingredient in a cake. However, please don't be alarmed. This cake is wonderful, combining a fudgy, moist texture and a rich, chocolatey flavour with a hint of spiciness thanks to the pumpkin. It is not overly sweet and although it looks quite dense, it actually isn't. It is perfect as an Italian breakfast cake or as a mid-morning/mid-afternoon snack with a cup of coffee and it keeps brilliantly. It is quite a plain-looking cake but I rather like that. You could ice it though with a vanilla scented cream cheese icing, the sort you would use on a carrot cake.

The origins of this cake lie in Mantova, a fairy-tale city that seems to rise out of the lakes that surround it. It is at its best at this time of year when the mist adds an ethereal quality and with both the tourists and mosquitoes gone, you can wander freely around the magical, historic centre, stopping for an espresso in a cafe on the cobbled square. The region is famous for pumpkins - you find them in everything, from the famous tortelli, where they are used, along with crushed amaretti, to make the filling to pies, cakes and biscuits.

I'm sending this over to We Should Cocoa, the monthly blogging challenge, started by Choclette of Chocolate Log Blog and Chele of Chocolate Tea Pot, which each month selects an ingredient or theme to be paired with chocolate. This month's theme is Pumpkin, hosted by Hungry Hinny.


I'm also sending it to Nazima (formerly of Working London Mummy) at her wonderful new home Franglais Kitchen. She is this month's host of The One Ingredient Challenge (Pumpkin and Squash), run jointly with Laura at How to Cook Good Food. She is also hosting the Simple and In Season challenge, run by Ren of Fabulicious Food.


Last but not least, I'm sending it to Javelin Warrior's wonderful weekly challenge, Made with Love Mondays.

JWsMadeWLuvMondays


RECIPE

350-400g pumpkin, after removing skin and seeds, roughly chopped
200g self raising flour
4 eggs
200g caster sugar
100g butter, melted
40g cocoa powder

Pre-heat the oven to 180°C

Grease and base line a round cake tin, 24cm diameter

Start by making the pumpkin puree. Place the chopped, skinless, seedless pumpkin in a steamer and steam for about 30 mins or until soft. Blend (or mash) to a smooth puree.


Put the eggs in a bowl with the caster sugar and whisk (preferably not by hand!) until thick and voluminous.

Sieve in the flour and cocoa powder and mix gently. Then add the melted butter and the pumpkin puree, whisking all the time until everything is smoothly amalgamated.

Pour the batter into the tin and bake for about 45-50 mins. If it starts to burn on top, cover loosely with foil.

Leave to cool for about 20 mins before turning out of the tin onto a wire rack.

Serve dusted thickly with icing sugar.


Monday, 24 September 2012

Apple and Walnut Cake

Apple and Walnut cake

I first came across this kind of apple cake in Italy - I spotted it in a bakery, sitting proudly and invitingly on a wooden board under the glass counter, plump with the promise of fragrant, moist apple. Not being able to resist, I bought a generous slice and devoured it as soon as I reached home. It did not disappoint, the apple ensured that it was not dry like many other types of cake in Italy and the addition of cinnamon gave a spicy contrast to the sweetness.
I have since made it many times at home, varying it slightly as the mood takes me. For some reason I like to include walnuts if I make it as one, large round cake but I prefer to leave them out when making individual cupcakes (see here for that recipe).
Although the poor summer has had an adverse effect on a lot of fruit and vegetables this year, my apple harvest is fantastic, the trees groaning with fruit. I used one cooking apple and two red apples for this but you can use whatever you happen to have to hand.

I'm sending this to Katie Bryson from the lovely blog Feeding boys and a firefighter, who is this month's host of the Simple and In Season challenge, the brainchild of Ren at Fabulicious Food.


I'm also sending it to Javelin Warrior's wonderful weekly challenge, Made with Love Mondays.
JWsMadeWLuvMondays


RECIPE

150g butter
180g caster sugar
180g self raising flour
1-2 teaspoons cinnamon (depending on taste)
3 eggs
3 apples
40g walnuts

Pre-heat the oven to 180°C

Grease and base line a round cake tin, 22cm diameter

Peel and core the apples. Chop into small dice. Roughly chop the walnuts.

Cream the butter and sugar together. Add the eggs one at a time, whisking well after each addition. Sieve the flour and cinnamon and fold in, then add the apples and walnuts, stirring well to combine.

Spoon the mixture into the prepared tin, smoothing the top.


If you want a slightly crunchy top, you can sprinkle over a spoon of demerara sugar just before it goes into the oven.

Put in the oven and bake for about 30-35 mins or until the cake is cooked and golden brown on top. It takes slightly longer to cook than a normal sponge cake because of the addition of moist apple.

Remove from the oven. Take the cake out of the tin as soon as possible (without burning yourself of course) and leave to cool on a wire rack.


It is absolutely heavenly eaten still slightly warm from the oven but it also keeps very well because the apple helps the cake stay deliciously moist.

Apple Cake


Monday, 17 September 2012

Risotto ai funghi


To my mind, mushroom risotto heralds the start of autumn and although there are a still a few days to go until summer officially ends, the crisp, bright mornings, the dark evenings and the golden leaves falling from my silver birch tree have instilled in me a 'mists and mellow fruitfulness' kind of mood. It was either risotto-making or putting away my summer clothes and I don't feel quite ready to take that step yet.

Risotto ai funghi is an Italian classic. The best versions are made with the king of mushrooms, fresh porcini, which are coming into season right now. They have an incredibly rich, aromatic, almost meaty flavour that is vigorous enough to withstand a fair amount of cooking. However, while I would love to be able to say that this risotto was made with porcini that I picked on a walk in the woods yesterday, it would not be true. I have never yet found any in this area but I am convinced that they do grow here as conditions are surely perfect. There is no need to despair however as a delicious risotto can be made with a combination of dried porcini (which you can fortunately buy everywhere) and some fresh chestnut mushrooms added towards the end of the cooking time.

I always have a packet of dried porcini in the larder as their intense mushroomy flavour not only makes a fantastic risotto but also adds instant 'umami' to a whole variety of sauces and stews. The other ingredient that turns this risotto into something special is a porcini stock cube. I hardly ever use stock cubes but I make an exception for these (dadi Star ai Funghi Porcini) as they add a real punchy flavour. I usually stock up when I'm in Italy because they are not easy to find in the UK but happily, Carluccio's has recently started selling them.

I'm sending this to Katie Bryson from the lovely blog Feeding boys and a firefighter, who is this month's host of the Simple and In Season challenge, the brainchild of Ren at Fabulicious Food.


RECIPE
Serves 2 generously

1 shallot (or half an onion), finely chopped
1 clove garlic, finely chopped
30g dried porcini mushrooms
50g butter
1 teaspoon olive oil
1 glass dry white wine
1 litre mushroom stock (made with porcini stock cube, see above)
250g carnaroli or arborio rice
200-250g chestnut mushrooms
generous grating of fresh parmesan
Put the dried mushrooms to soften in a jug of warm water for about half an hour.

Take the mushrooms out of the water (but make sure you don't throw it away as you will need it later on) and rinse them well, making sure there are no tiny particles of grit or soil left lurking in any crevasses. Chop them roughly but don't make them too small. Filter the mushroom water by pouring it through a sieve lined with a sheet of kitchen towel. You can add this to the stock.


Heat a tablespoon of olive oil and the knob of butter in a pan and add the finely chopped shallot and garlic. Cook over a gentle heat until soft, making sure they do not start to burn. Add the dried porcini mushrooms and carry on cooking for a few minutes.
Tip in the rice and stir well so that all the grains are coated in the buttery juices. Turn up the heat to medium and pour in the wine. Keep stirring until it is absorbed.

Start adding the stock, a ladleful at a time, making sure it is all absorbed before adding the next, stirring all the while to make sure the rice doesn't start to stick.
In the meantime, roughly chop the chestnut mushrooms and fry in a separate pan with a little oil until golden brown.
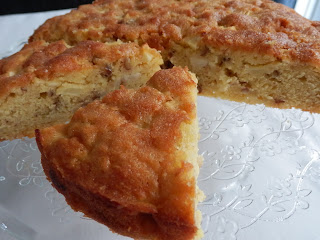
The rice should be cooked after about 18-20 minutes (it should still have a slight 'bite' to it). You might not need all the stock or you may need a little more (you could just add boiling water). Stir in the cooked chestnut mushrooms at this point.

Add a generous knob of butter, stirring all the time so that it melts into the risotto and the texture becomes creamy. You can also beat in the parmesan at this point or you can sprinkle it over just before eating if you prefer.

Tuesday, 7 August 2012

Grilled aubergines


Aubergines prepared in this way are incredibly versatile. They can be eaten on their own, with just a chunk of cheese and some good bread or they can accompany a whole variety of meat and fish dishes; my current obsession is aubergines with lamb, particularly if the lamb has been simply cooked on the barbecue - the flavours work so well together. I sometimes use them as a sandwich filler too - try a few slices on a crusty roll or ciabatta, along with some buffalo mozzarella. Another point in their favour is that they can be prepared in advance - indeed, the dish tastes even better the next day because the aubergines have had time to absorb the subtle aromas of the herbs.

The recipe below is how I've been making them recently (my mint has been getting out of hand and this is a great way to use it) but you can vary the herbs as you wish, perhaps changing them to suit the dish that they will be served with. The quantities are also quite approximate here because again, it's a matter of personal preference.

The generous quantities of herbs used in this dish mean that it can be sent to one of my favourite challenges, Herbs on Saturday, thought up and hosted by Karen from the wonderful Lavender and Lovage http://www.lavenderandlovage.com/herbs-on-saturday.

Herbs on Saturday

As aubergines are at their best in August, I'm also sending this to Ren at Fabulicious Food for her Simple and In Season challenge, which is always so inspiring.


RECIPE

2 aubergines
a handful of fresh basil
a handful of fresh mint
1 clove garlic
balsamic vinegar
extra virgin olive oil

Slice the aubergines fairly thinly (about half a centimetre). Heat a ridged grill pan and cook the aubergines in batches, until quite soft and nicely striped on both sides.
Remove the slices to a wide dish and dress while still warm with olive oil and balsamic vinegar. Roughly chop the herbs and garlic and add, along with some sea salt and freshly ground black pepper, to the aubergine slices, mixing all the ingredients gently together with your hands.
Cover with cling and leave in a cool place for a couple of hours or up to day.
When you want to serve them, arrange the slices on a serving plate and sprinkle over a few more fresh herbs.